3D Printer - Anycubic Photon Mono X
Shipping costs and GST (for Australian
customers) are calculated at checkout.
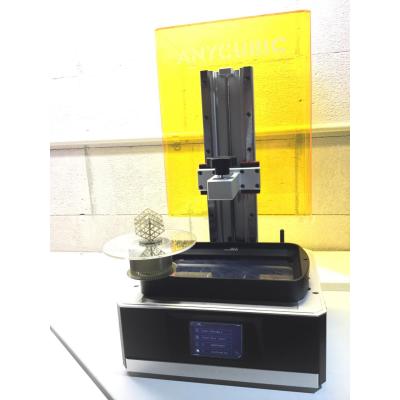
For small 3D prints up to 120mm we use the Anycubic Photon Mono X. This series has over 40,000 users and we support highly detailed models with a selection of resins.
Resin prints layer by layer, using a 405nm UV light masked by a high contrast LCD screen. The surface finish is of a high quality thanks to 50 micron precision on all dimensions. Compatible slicer software is included. No hardware or drivers required - transfer the generated files to a USB drive and plug into the machine to print.
Resin machines such as this offer smoother prints at higher resolutions than similarly priced filament based printers.
Frequently Asked Questions:
Why does it show my USB drive as empty?
USB drives must be formatted to FAT16 or FAT32.
- Mac OSX: open Disk Utility then choose Erase
- Windows: right-click the drive and choose Format
NTFS, ExFAT, APFS and Mac OS will show no files.
How to detect the correct software version?
- Preview image is missing in Choose Files menu
- Print command will error saying "Failed to open file"
- Try other software versions if you experience the above.
Where to download Photon Workshop software?
Use the included USB drive to install Photon Workshop. Firmware determines the compatible PW version. Download the matching version for its firmware from Anycubic.
Windows:
- Photon_WorkShop_V1.0.0.exe
- Photon_WorkShop_V2.0.23.exe
- Photon_WorkShop_V2.1.17.exe
- Photon_WorkShop_V2.1.19.exe
- Photon_WorkShop_V2.1.20.exe
- Photon_WorkShop_V2.1.21.exe
Mac OSX:
- Photon_WorkShop_V1.0.0.dmg
- Photon_WorkShop_V2.0.23.dmg
- Photon_WorkShop_V2.1.19.dmg
- Photon_WorkShop_V2.1.20.dmg
- Photon_WorkShop_V2.1.21.dmg
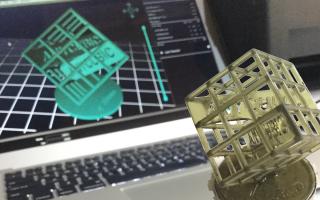
Training available
From hands-on setup and configuration, model and material selection, through to post print cleanup and maintenance to maximise yield and ensure long machine lifetime.
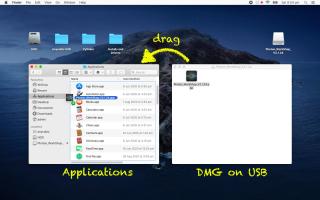
Install Photon Workshop
Insert the USB stick and open the DMG file. Drag the Photon Workshop app into your Applications folder.
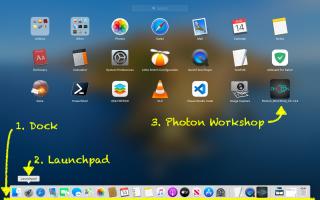
Open Photon Workshop
Reveal the Dock at the bottom of the screen. Click on Launchpad to show applications. Click on Photon Workshop to launch. There may be a second page of apps - see the small white circles to page between them if needed.
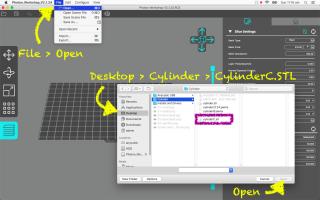
Open STL File
Go to File > Open. Then choose any STL file from Desktop or Downloads. Photon Workshop also supports OBJ models.
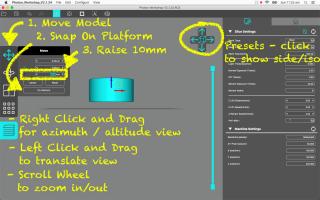
Raise the model in Z
Click the Move tool, then click On Platform, then set Z = 10mm. This will raise it off the origin plane. To verify this, right-click and drag anywhere on the canvas to witness space between the model and origin plane.
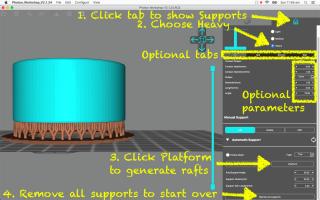
Add rafts to model
At top-right click the Supports tab. This reveals the tools to generate a platform automatically, with parameters for raft size etc. Or click Remove All Supports (scroll down to reveal button) then experiment and repeat etc.
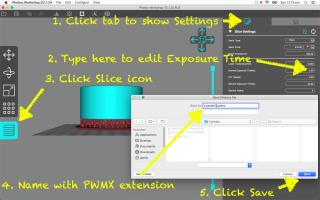
Slice to PWMX file
At top-right click the Settings tab. This restores the slice settings screen with move/pan/tilt. Review the on screen settings, then click the Slice icon and name the file with a PWMX extension.
All orders are subject to our terms and conditions of sale.

